Um....yeah, that is my 3-3/4th year old
with a hammer and nails. What can I say
the kid has always loved tools and has a
knack for using them.
So, this craft was right up his ally.
I purchased a plain wood plaque at
Michaels and painted it orange.
His favorite color, of-course.
Then set him loose with a hammer and
1" finish nails. Once he was over the
hammering I gave him a giant ball
of colored rubber bands.
Then the stretching, connecting and the
occasional finger trauma ensued. ;)
This has been our best "boy" craft yet. HE WAS INTO IT.
He did take a brake but, asked to do more. Over the course
of an afternoon he had this to show for all his finger oweeeees.
A few days latter he pulled off the rubber bands,
added a few more nails and now his little project looks like this.
Crafting with hammer, nails and rubber bands........ awesome.
Friday, December 30, 2011
Saturday, December 24, 2011
Christmas Village
Construction has started, on my own little holiday village.
Wanna meet the residents????
Frosty was the first to move to town.
I hope he'll be cool and cozy in his new little home.
This sparkly little home belong to Mr. Jack Frost.
This candy cane cottage is home to one of Santa's candy cane
making elves.
I wish candy canes grew in my garden.
Oh my, is that who I think it is.
Yes, it is...... the Sugar Plum Fairy has moved to town!
No self respecting town would be complete with out a Church.
I love these vintage little wooden ornaments. They remind me
of my Grandma. Her tree was covered in them. I spent many
hours re-glueing them with her each year. ;)
The thing about this Church is I made TWO.
Exactly the same, one for you and one for me.
Oh yah, GIVE AWAY TIME!!!!!!!
Leave a comment on this post from now
until December 31st to be entered in the giveaway.
I'll announce the winner on New Years Day!!!
Thanks for reading this little blog of mine and Merry Christmas.
Wanna meet the residents????
Frosty was the first to move to town.
I hope he'll be cool and cozy in his new little home.
This sparkly little home belong to Mr. Jack Frost.
This candy cane cottage is home to one of Santa's candy cane
making elves.
I wish candy canes grew in my garden.
Oh my, is that who I think it is.
Yes, it is...... the Sugar Plum Fairy has moved to town!
No self respecting town would be complete with out a Church.
I love these vintage little wooden ornaments. They remind me
of my Grandma. Her tree was covered in them. I spent many
hours re-glueing them with her each year. ;)
The thing about this Church is I made TWO.
Exactly the same, one for you and one for me.
Oh yah, GIVE AWAY TIME!!!!!!!
Leave a comment on this post from now
until December 31st to be entered in the giveaway.
I'll announce the winner on New Years Day!!!
Thanks for reading this little blog of mine and Merry Christmas.
Tuesday, December 6, 2011
Candy Cane Blossom Cookies
OK! What happened????
It's December..... when DID, that happen??
I still have plenty of fall posts left to be published!!!
My kids have been sick off and on since Halloween.
So, November just slipped threw my fingers. :(
Oh well..... move-en on.
Trees up and cookies are baking.
Hershey sugar cookie blossom.
F.E.S.T.I.V.E. and E.A.S.Y.
Start by unwrapping the candy cane kisses and pre-heating
your oven to 350 degrees.
Beat 1/2 cup butter, 1 cup sugar, 1 egg and 1-1/2 teaspoon
of vanilla together in a large bowl.
In a separate bowl combine 2 cups all purpose flour,
1/4 teaspoon salt and 1/4 teaspoon baking soda until well mixed.
Add this mixture along with 2 tablespoons of milk alternately to
the butter mixture.
Roll a piece of dough into a 1 inch size ball and coat in sugar.
Bake at 350 for 8 to 10 minutes.
I love the crunchy crust the bigger sugar crystals give.
Let the cookies cool for 2 to 3 minutes and
then place a kiss in the center. The kisses melt
but, retain their shape. Once completely cool the
kissed harden back up again...... good as new. ;)
So, so festive.
+++++++++++++++++++++++++++++++++++++++++++
On a side note....
My parents are moving closer to us. Yeah!
Their new house is not quite ready yet.
So, that mens starting Monday we are having
house guests for about 3 weeks..... during the
HOLIDAYS!!!!
I don't know how much attention this little blog
of mine will be receiving. So, if you are a reader
stay tunes I haven't abandoned ship! ;)
It's December..... when DID, that happen??
I still have plenty of fall posts left to be published!!!
My kids have been sick off and on since Halloween.
So, November just slipped threw my fingers. :(
Oh well..... move-en on.
Trees up and cookies are baking.
Hershey sugar cookie blossom.
F.E.S.T.I.V.E. and E.A.S.Y.
Start by unwrapping the candy cane kisses and pre-heating
your oven to 350 degrees.
Beat 1/2 cup butter, 1 cup sugar, 1 egg and 1-1/2 teaspoon
of vanilla together in a large bowl.
In a separate bowl combine 2 cups all purpose flour,
1/4 teaspoon salt and 1/4 teaspoon baking soda until well mixed.
Add this mixture along with 2 tablespoons of milk alternately to
the butter mixture.
Roll a piece of dough into a 1 inch size ball and coat in sugar.
Bake at 350 for 8 to 10 minutes.
I love the crunchy crust the bigger sugar crystals give.
Let the cookies cool for 2 to 3 minutes and
then place a kiss in the center. The kisses melt
but, retain their shape. Once completely cool the
kissed harden back up again...... good as new. ;)
So, so festive.
+++++++++++++++++++++++++++++++++++++++++++
On a side note....
My parents are moving closer to us. Yeah!
Their new house is not quite ready yet.
So, that mens starting Monday we are having
house guests for about 3 weeks..... during the
HOLIDAYS!!!!
I don't know how much attention this little blog
of mine will be receiving. So, if you are a reader
stay tunes I haven't abandoned ship! ;)
Monday, November 21, 2011
Pumpkin Gingerbread
Yum.....
I like to make thing from scratch.... but,......
I'm all about dressing up the store bought or,
making the box stuff better. Sometimes it's
just a time thing.
I like Trader Joe's products. Not a lot of junk
in the ingredients. AND very tasty. So, less
guilt about the whole not from scratch thing. ;)
I had these lying around in my pantry.
Let's just say it was a no brainer.
Pumpkin, gingerbread, toffy and chocolate chips.
Oh my.....
Prepare the gingerbread according to the package directions.
You can omit the oil if you like. Add the whole can of pumpkin.
Mix and add the chocolate chips and toffee bits. I baked these in a
muffin pan lined with cupcake papers. In a 350 degree oven for
45 minutes.
These were yummy, rich, and dense like
a sticky pudding. With a little whipped cream
ya can't go wrong.
Just ask this guy. Little stinker.... snuck in and
demolished them.
I like to make thing from scratch.... but,......
I'm all about dressing up the store bought or,
making the box stuff better. Sometimes it's
just a time thing.
I like Trader Joe's products. Not a lot of junk
in the ingredients. AND very tasty. So, less
guilt about the whole not from scratch thing. ;)
I had these lying around in my pantry.
Let's just say it was a no brainer.
Pumpkin, gingerbread, toffy and chocolate chips.
Oh my.....
Prepare the gingerbread according to the package directions.
You can omit the oil if you like. Add the whole can of pumpkin.
Mix and add the chocolate chips and toffee bits. I baked these in a
muffin pan lined with cupcake papers. In a 350 degree oven for
45 minutes.
These were yummy, rich, and dense like
a sticky pudding. With a little whipped cream
ya can't go wrong.
Just ask this guy. Little stinker.... snuck in and
demolished them.
Sunday, November 13, 2011
Giving Thanks
I am thankful.
My life isn't perfect but, it is beautiful.
Through all the ups and downs, (more up) I have remained thankful.
Each and every twist and turn life throws at me has taught me something,
and for this...... I. AM. THANKFUL.
With THANKS GIVING around the corner
this is the perfect time of year to show some thanks.
Each of my November crafts will have a "thankful" theme.
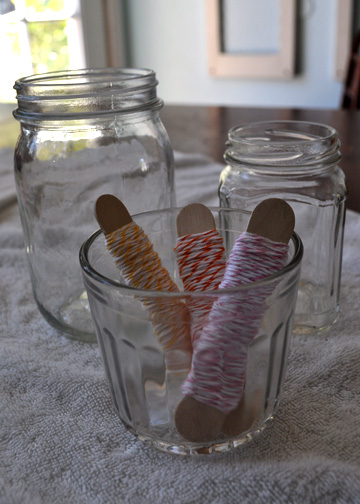
First up are these jelly jars covered in Divine Twine.
Wouldn't these make the perfect thing to leave on a friends porch?
A grown up game of doorbell ditch......... too fun!!!
Just a little something to let a special friend
know you are thankful for them being in your life.
You will need
Divine Twine
Ribbon or lace
Tags
Rubber stamps, unless you are blessed with
impeccable penmanship, which I am so not.
Glue gun and glue sticks
Scissors
A selection of cleaned and dried jelly jars.
Round jars with a lip at the top work the best.
AND your running shoes..... for the ditching
portion of this project.
Start by placing a small dot of glue at the top of the jar.
Begin wrapping the twine. Adding little dots of glue as you
need them to hold the twine in place.
If I was doing this project again I would use double stick
tape to secure the twine like I did here.
You can cover the jars completely in the twine
or leave space to add some lace or ribbon.
Use one color of twine or mix and match.
I love the gray and orange combo.
I like the way stamping directly onto the ribbon looks.
Now get your glue guns and running shoes
on and go out there and spread a little thankfulness.
My life isn't perfect but, it is beautiful.
Through all the ups and downs, (more up) I have remained thankful.
Each and every twist and turn life throws at me has taught me something,
and for this...... I. AM. THANKFUL.
With THANKS GIVING around the corner
this is the perfect time of year to show some thanks.
Each of my November crafts will have a "thankful" theme.
First up are these jelly jars covered in Divine Twine.
Wouldn't these make the perfect thing to leave on a friends porch?
A grown up game of doorbell ditch......... too fun!!!
Just a little something to let a special friend
know you are thankful for them being in your life.
You will need
Divine Twine
Ribbon or lace
Tags
Rubber stamps, unless you are blessed with
impeccable penmanship, which I am so not.
Glue gun and glue sticks
Scissors
A selection of cleaned and dried jelly jars.
Round jars with a lip at the top work the best.
AND your running shoes..... for the ditching
portion of this project.
Start by placing a small dot of glue at the top of the jar.
Begin wrapping the twine. Adding little dots of glue as you
need them to hold the twine in place.
If I was doing this project again I would use double stick
tape to secure the twine like I did here.
You can cover the jars completely in the twine
or leave space to add some lace or ribbon.
Use one color of twine or mix and match.
I love the gray and orange combo.
I like the way stamping directly onto the ribbon looks.
Now get your glue guns and running shoes
on and go out there and spread a little thankfulness.
Thursday, November 10, 2011
Lucky Me
I won, I won, I won!!!!
Jan over at Little Pink Houses had a giveaway,
in celebration of her 200th blog post.
I know Jan so i feel like I cheated.
BUT, the random number generator
does. not. lie. So, there... hum.
I was so excited to get my hands on this package.
I know Jan to be very creative and generous.
So, I couldn't wait to see what was wrapped
up and waiting for me. This package did not
disappoint.
Beautiful Victorian style papers.
Rolls of vintage sheet music and festive trim.
Little lace doilies, vintage buttons, dresden, and admission tickets.
pretty
Place cards, amber beading, vintage note book, and tally sheets.
This package just kept giving.
More trim and vintage ribbon, feathers, shimmery floral picks,
and some bitty bags.
Embroidery floss, vintage millinery flowers, divine twine.
super pretty
yummy color......
Thanks Jan!
I've been using some of these treasures in my fall crafts.
Posts coming soon, my family and I have been a little
under the weather. So, blogging has taken a back seat to
nose whipping and kid cuddling.
Something crafty coming soon. ;)
Until then, go check out my friend Jan's BLOG!
Jan over at Little Pink Houses had a giveaway,
in celebration of her 200th blog post.
I know Jan so i feel like I cheated.
BUT, the random number generator
does. not. lie. So, there... hum.
I was so excited to get my hands on this package.
I know Jan to be very creative and generous.
So, I couldn't wait to see what was wrapped
up and waiting for me. This package did not
disappoint.
Beautiful Victorian style papers.
Rolls of vintage sheet music and festive trim.
Little lace doilies, vintage buttons, dresden, and admission tickets.
pretty
Place cards, amber beading, vintage note book, and tally sheets.
This package just kept giving.
More trim and vintage ribbon, feathers, shimmery floral picks,
and some bitty bags.
Embroidery floss, vintage millinery flowers, divine twine.
super pretty
yummy color......
Thanks Jan!
I've been using some of these treasures in my fall crafts.
Posts coming soon, my family and I have been a little
under the weather. So, blogging has taken a back seat to
nose whipping and kid cuddling.
Something crafty coming soon. ;)
Until then, go check out my friend Jan's BLOG!
Saturday, October 29, 2011
Witch's Hat
Have you finished you costume yet???
I don't dress up for Halloween but, I have kids now.
My 3 year old asked me what I was going to be.
Oh,... um... ??? here we go........
So, I made a Witch's hat.
I started out with a chipboard hat and painted
it black. Then added some sparkly ribbon.
I added a few trim pieces then placed my helpers.
This guy needed a little gentle persuasion....
His wings are sniped off bits of Christmas floral picks.
Hot glued to his back.
My dear little crow was jealous. So, she required a bit of glitter.
Once my little cast of characters were hot glued into place it was
time for a topper. AND some lighting, of course!
Tip, place the lights with pins before cutting holes.
I used a sharp craft knife like a drill to make my holes.
Yes, It will look like a mess of spaghetti...
I added pieces of hook and loop tape to secure the battery
pack into the hat.
For the chin strap I added long pieces of ribbon.
They can be tied under the chin to secure the hat.
Tip, do NOT tie the ribbon in a knot.
Tying a knot would make too large of a hole.
I used pliers to help pull the needle threw.
Once the ribbon was threw I tied the end in a knot and hid it
under the trim that goes along the base of the hat.
A few detail shots..
Love-en the lights....
I used LED lights, the don't get so hot.
The topper was placed by snipping the tip off the hat, pushing
one of the points into the hole. Securing with more hot glue
of course.
WHAT WOULD WE DO WITH OUT HOT GLUE?????
Thanks to my dear little neighbor
Witch for modeling for me!!
Trick-or-Treat!
I don't dress up for Halloween but, I have kids now.
My 3 year old asked me what I was going to be.
Oh,... um... ??? here we go........
So, I made a Witch's hat.
I started out with a chipboard hat and painted
it black. Then added some sparkly ribbon.
I added a few trim pieces then placed my helpers.
This guy needed a little gentle persuasion....
His wings are sniped off bits of Christmas floral picks.
Hot glued to his back.
My dear little crow was jealous. So, she required a bit of glitter.
Once my little cast of characters were hot glued into place it was
time for a topper. AND some lighting, of course!
Tip, place the lights with pins before cutting holes.
I used a sharp craft knife like a drill to make my holes.
Yes, It will look like a mess of spaghetti...
I added pieces of hook and loop tape to secure the battery
pack into the hat.
For the chin strap I added long pieces of ribbon.
They can be tied under the chin to secure the hat.
Tip, do NOT tie the ribbon in a knot.
Tying a knot would make too large of a hole.
I used pliers to help pull the needle threw.
Once the ribbon was threw I tied the end in a knot and hid it
under the trim that goes along the base of the hat.
A few detail shots..
Love-en the lights....
I used LED lights, the don't get so hot.
The topper was placed by snipping the tip off the hat, pushing
one of the points into the hole. Securing with more hot glue
of course.
WHAT WOULD WE DO WITH OUT HOT GLUE?????
Thanks to my dear little neighbor
Witch for modeling for me!!
Trick-or-Treat!
Subscribe to:
Posts (Atom)