Wednesday, January 1, 2014

Valentine's Day Treat Bag

The "Ball" has barely dropped and the Christmas decorations
aren't entirely put away yet, but............


how's about a Valentine's craft. After all it's never too late to
start on the "next" thing!

I just love the Whisker Graphics product line!
The stickers the tags the bitty bags.


All of which I used to make up this cute little Valentine's Day
treat bag. From the first time I saw these Shield Craft Middy Bitty Bags
I've wanted to place a deer silhouette on them! Sooo so cute!
These would make a perfect little Valentine for the men in your life.


I drew the silhouette with a pencil then colored it in with a pen.
Stickers or a rubber stamped silhouette would work great too.


I think this is by far my favorite bitty bag craft I've made.
Then again I say that every time!


Supplies:

Shield Middy Bitty Bags
Red Chevron Petite Stickys
Small Colored Tags in Red
Doily
Pen and Pencil
Rubber Stamps and Ink


Wednesday, December 4, 2013

Holiday Peace Wreath


Happy Holidays to everyone. Have you seen the new super
luxurious metallic baker's twine offer by Whisker Graphics??
It comes in gold and silver!!


My night time photography does not do it justice.
It's so elegant and refreshing. Really nice color quality!
The gold and silver match up to Martha Stewart's glitter
really well.


For my monthly Whisker Graphics project,
I decided to make a wreath that can carry threw
to the New Year. With style and sentiment.

The wreath form is 10" across and about 1-1/2"
wide and thick. I used half a roll of twine to
cover the wreath.


The chipboard letters and stars are pre-made
and can easily be found at Michaels. I just used
a little glitter to add some silver to them.


This little vintage angle has lived in my stash for some time now.
With a bit of glitter she was perfect to hang in the center of my wreath.


May your Holiday Season and New Year be filled with PEACE.

Supplies:

Metallic Divine Twine in silver
Wreath form
Chipboard letters and stars
Vintage ornament
Glitter
Glue gun and glue sticks
Craft glue
Scissors


Wednesday, November 6, 2013

Easy Thanksgiving Place Card and Favor Bag


Perhaps you are looking for a quick little craft to jazz up your
Thanksgiving table?? Something that can double as a place card
and a little take home favor bag.


For this little treat bag I started out by tracing a leaf
shape onto a plain kraft bag. Then cut it out creating
a pouch to slip over the orange honeycomb middy bitty bag.

EASY!!!


Then I stamped out a little seasonal note and added
a tag stamped with the name of my guests.


REALLY EASY!!!!!


Supplies:

Brown Kraft Bags
Orange Honeycomb Middy Bitty Bag
Small Colored Tags in orange
Raffia
Scissors
Pencile
Stamps and ink

Wednesday, October 2, 2013

DIY Day of the Dead Sugar Skull Craft

I like Halloween but,


I love Day of the Dead!

...the celebration, the colors, the vibrancy...

I especially love all the colors and detail of those
little sugar candy skulls.

Soooo, I had to craft one.


I found these little paper mache skulls at Michael's. I painted
mine white.


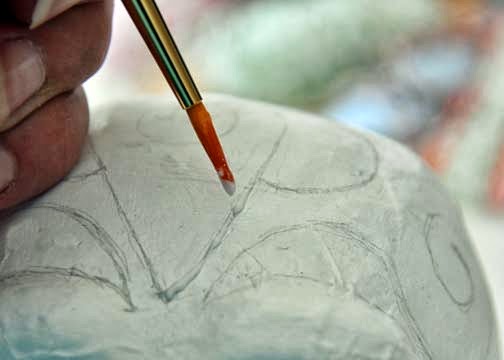
Once dry, I got to work on drawing out my pattern.


 Next I traced my lines with glue.


Then I began to lay out my twine as if I was piping royal icing.


So much fun! I couldn't think of a better product to use for this project.
SERIOUSLY!! The best colors!!


When I was done with twining the skull I add a
lovely fine glitter. Very realistic sugar! Don't ya think!?


Here is a view of the front and back.


After the glitter dried I cut a whole in the bottom of the skull.


Just large enough to fit one of those battery operated tea lights.


I pained and glittered the inside of the skull too.

I loved making this Day of the Dead sugar skull!
It was a nice departure from Halloween crafting.

Supplies:

Paper Mache skull
White paint
Craft glue
Pencil
Paint brushes
Scissors
Craft knife
Super fine glitter
Divine Twine


Wednesday, September 4, 2013

Bakers Twine Christmas Tree Craft

Is it too early to start crafting for Christmas?
My kids just went back to school. I haven't
even made one pumpkin recipe yet.


Oh.... but,  those Christmas crafts just keep
poppen' in my head.

This little Christmas craft is super simple.
Start by painting a chipboard cone white.
Once the paint is dry wrap the cone in
bakers twine. Securing the twine with glue
as you go.


Then decorate your Christmas tree with buttons
and ric rac. Coat the tree with glue and sprinkle
with glitter. Everything is more festive with glitter!


For the trunk of my little tree I used a vintage spool.
Just painted it white and sprinkles with some snow.


I can't wait to make a whole little forest of these.


Supplies

Green Apple Divine Twine
Chipboard cone
Paint
Glue
Buttons
Ric rac
Sewing spool
Glitter
Fake snow


Wednesday, July 31, 2013

DIY Summer Bracelet


I love working with these products! They have such great color
and texture.

For this months Whisker Graphics Design Team project
I chose to makeover some old bangles.


Secure the bakers twine with a little hot glue.


As you wrap the twine around the bracelet secure it
with more glue.


As you wrap make sure to keep the twine tight and close together.


Pretty as is but,........ now it's time to decorate.


I added a vintage shell button to the larger bangle.
Fresh and summery.


Keeping that summer thing going.....
I added a string of pearls on the thiner bracelet.


Using a needle string the pearls onto the twine. Wrap the
twine around the bracelet. Placing and adding beads as you go.


So pretty, loven' this little detail


Sooooo much better than that 80's purple. Don't cha think?!


Supplies:
Plain and smooth bangles
Lemon Divine Twine
Glue gun
Scissors
Needle
Buttons and beads

Thursday, July 4, 2013

Mini Birthday Banner


Aren't these stickers SUPER cute!!!!!
I was super happy to receive a sampling of them to play with.
There NEW from Whisker Graphics!!!  ;)

I couldn't resist making a birthday banner.


Don't those colors just scream happy and party?


I wrapped some scrap bitty bag around a popsicle stick for a holder.


Wrote happy birthday on some of those awesome stickers.

Attached the stickers to some divine twine.


Isn't that chick too cute!?!


Tied the banner to the popsicle sticks....... and there ya have it!


A super festive birthday banner perfect for topping a cake, or
even about mailing it to a friend.


Supplies:

Petite Stickys
Deep Pink Solid Divine Twine
Bitty Bag Scraps
Glue
Scissors
Pen
Popsicle sticks