Thursday, July 4, 2013
Mini Birthday Banner
Aren't these stickers SUPER cute!!!!!
I was super happy to receive a sampling of them to play with.
There NEW from Whisker Graphics!!! ;)
I couldn't resist making a birthday banner.
Don't those colors just scream happy and party?
I wrapped some scrap bitty bag around a popsicle stick for a holder.
Wrote happy birthday on some of those awesome stickers.
Attached the stickers to some divine twine.
Isn't that chick too cute!?!
Tied the banner to the popsicle sticks....... and there ya have it!
A super festive birthday banner perfect for topping a cake, or
even about mailing it to a friend.
Supplies:
Petite Stickys
Deep Pink Solid Divine Twine
Bitty Bag Scraps
Glue
Scissors
Pen
Popsicle sticks
Wednesday, June 5, 2013
4th of July Treat Bag
Well.........
Kids are out of school, warmer weather is
here and July 4th is just around the corner.
Whisker Graphics has a whole slew of
products to make the cutest treat bags for
July 4th celebrations.
Supplies:
Red Diagonal Stripe Kraft Little Bitty Bags
Air Mail Divine Twine
Small Colored Tags
Glitter star
American Flag pick
Glue
Whole punch
Pen
Kids are out of school, warmer weather is
here and July 4th is just around the corner.
Whisker Graphics has a whole slew of
products to make the cutest treat bags for
July 4th celebrations.
Supplies:
Red Diagonal Stripe Kraft Little Bitty Bags
Air Mail Divine Twine
Small Colored Tags
Glitter star
American Flag pick
Glue
Whole punch
Pen
Quick and Easy Gift Card Holders
These quick and easy gift card holders make giving gift cards
just a little more special.
A little bit of washi tape, some glue, and a couple of
Whisker Graphics large Colored Tags and that's all it
takes to create a special little gift card holder.
A gift card fits perfectly between 2 large colored tags.
Here is another variation of a gift card holder.
Prefect for the often forgotten male teacher.
Supplies:
Whisker Graphics Large Colored Tags
Divine Twine
Washi tape
Glue
Scissors
Rubber stamps & ink
just a little more special.
A little bit of washi tape, some glue, and a couple of
Whisker Graphics large Colored Tags and that's all it
takes to create a special little gift card holder.
A gift card fits perfectly between 2 large colored tags.
Here is another variation of a gift card holder.
Prefect for the often forgotten male teacher.
Supplies:
Whisker Graphics Large Colored Tags
Divine Twine
Washi tape
Glue
Scissors
Rubber stamps & ink
Red Velvet Cookie Cups & Ice Cream Sandwiches
Red Velvet....... yum.
Especially when paired with Cheese Cake ice cream.
Red Velvet cookie cups or ice cream sandwiches.....
Why choose, when it is so easy to make both.
First start off by making the Red Velvet sugar cookie dough.
Cream together 1 cup of sugar and 1 cup of unsalted butter.
Add 1 egg, 1 tablespoon butter milk, and 1 teaspoon of white vinegar.
Mix until fluffy.
Add one ounce of red gel food coloring.
Sift together 3 cups all purpose flour,
1/4 cup unsweetened coco,
3/4 teaspoon baking powder,
1/4 teaspoon salt.
Add dry ingredients to the butter sugar mixture.
Chill dough 4 hours.
Roll dough to 1/4" thickness. For both the cookie cups and
the sandwich cookies.
For the sandwich cookies it's just as simple as baking them on
a cookie sheet.
For the cookie cups, lightly spray an inverted muffin pan with
non-stick spray. Place dough over the cup and press lightly.
Bake both the cookie cups and sandwich cookies at 350 degrees
for 10 minutes.
Aren't they cute?!?
Once the cups come out of the oven cool them for a few minutes
then gently slip the cups off the pan with a butter knife.
Fill with your favorite ice cream and enjoy.
A cheese cake ice cream is fab with this BUT,
plain old vanilla is pretty prefect too.
Yum
Cookie cups or sandwich cookies.......
...... still can't decide?
Just make both. ;)
Check out all the fun at,
Be Different Act Normal
Especially when paired with Cheese Cake ice cream.
Red Velvet cookie cups or ice cream sandwiches.....
Why choose, when it is so easy to make both.
First start off by making the Red Velvet sugar cookie dough.
Cream together 1 cup of sugar and 1 cup of unsalted butter.
Add 1 egg, 1 tablespoon butter milk, and 1 teaspoon of white vinegar.
Mix until fluffy.
Add one ounce of red gel food coloring.
Sift together 3 cups all purpose flour,
1/4 cup unsweetened coco,
3/4 teaspoon baking powder,
1/4 teaspoon salt.
Add dry ingredients to the butter sugar mixture.
Chill dough 4 hours.
Roll dough to 1/4" thickness. For both the cookie cups and
the sandwich cookies.
For the sandwich cookies it's just as simple as baking them on
a cookie sheet.
For the cookie cups, lightly spray an inverted muffin pan with
non-stick spray. Place dough over the cup and press lightly.
Bake both the cookie cups and sandwich cookies at 350 degrees
for 10 minutes.
Aren't they cute?!?
Once the cups come out of the oven cool them for a few minutes
then gently slip the cups off the pan with a butter knife.
Fill with your favorite ice cream and enjoy.
A cheese cake ice cream is fab with this BUT,
plain old vanilla is pretty prefect too.
Yum
Cookie cups or sandwich cookies.......
...... still can't decide?
Just make both. ;)
Check out all the fun at,
Be Different Act Normal
Wednesday, May 1, 2013
Look At What I Get To Play With.......
Look at what I got in the mail.
A box of new Whisker Graphics products. My eye was immediately
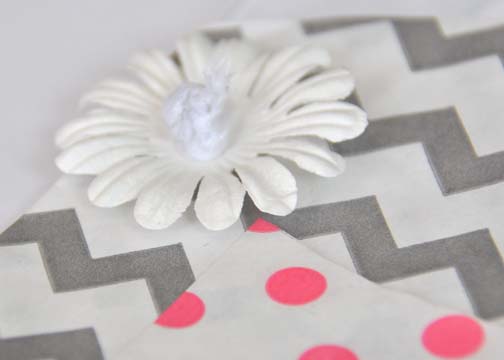
drawn to the NEW Silver Chevron Middy Bitty Bags. So much fun!
How cool would it be to use these as favor bags or gift bags for
a "Silver" 25th anniversary!?!
Cool.... huh!
I love these bags paired with Whisker Graphics
Gray Colored Tags.
A little hand lettering, a silvery gray ribbon.
A black mulberry flower and that's all you need to turn these
gorgeous bags into a festive gift or favor bag.
Can't wait to play with more of these awesome NEW products!
Supplies:
Sliver Chevron Middy Bitty Bags
Large Gray Colored Tags
Gray Ribbon
Ink
Mulberry Flower
Scissors
Glue
A box of new Whisker Graphics products. My eye was immediately
drawn to the NEW Silver Chevron Middy Bitty Bags. So much fun!
How cool would it be to use these as favor bags or gift bags for
a "Silver" 25th anniversary!?!
Cool.... huh!
I love these bags paired with Whisker Graphics
Gray Colored Tags.
A little hand lettering, a silvery gray ribbon.
A black mulberry flower and that's all you need to turn these
gorgeous bags into a festive gift or favor bag.
Can't wait to play with more of these awesome NEW products!
Supplies:
Sliver Chevron Middy Bitty Bags
Large Gray Colored Tags
Gray Ribbon
Ink
Mulberry Flower
Scissors
Glue
Wednesday, April 3, 2013
May Day Baskets Whisker Graphics Design Team Project
Don't ya just love spring?!
I do realize May Day is a month away........
but that means you'll have plenty of time to make
these May Day favor baskets to leave on your
friends and neighbors porches.
Supplies
Whisker Graphics Middy Bitty Bags & Little Bitty Bags
Whisker Graphics Large Colored Tags
Glue stick
Scissors
Hole punch
Hole reinforcers
Mulberry paper flowers
Ribbon
Rubber letter stamps and ink
Round edge of middy bitty bag.
Scallop the edge of the little bitty bag.
Rub a generous amount of glue on the back side of the
little bitty bag.
Place the little bitty bad in the center of the middy bitty bag.
Punch a hole in each side of the middy bitty bag.
Make sure the holes are in far enough so the bag doesn't
tear when hanging.
I used hole reinforcers on each side of the bag. This will help
eliminate any tearing that may happen when the May Day
basket is hanging.
Make a little tag to attach to the treat bag.
Stamp a May Day greeting to the tag and attach it to the
bag with ribbon.
Use a piece of ribbon long enough to use as a hanger for the bag too.
I used some mulberry paper flowers to finish things off.
The colors and patterns of these bags are so fun!
The combinations are limitless.
I couldn't resist making a gray and pink combo too!
Super pretty and spring-eee.....!
Fill the Middy Bitty Bag with some spring blooms
and the Little Bitty Bag with some sweet treats.
And go door bell ditch your friends. ;)
Have a Happy May Day.......... even though
it's a month away.....! ;)
Subscribe to:
Posts (Atom)