Saturday, May 19, 2012

New Wreath

Hi All,


Hope everyone's weekend is coming along nicely.
I got to sneak in a little craft time.  ;)
I made a new wreath for our front door.


I've had this vintage picture frame for years.
It was just begging to be turned into something special.
So, I decided to use it as a wreath base.


I gathered some chicken wire, a staple gun, and
some wire cutters and went to town.


Stapling right to left and top to bottom, pulling
tightly as I went. Then I cut off the excess wire
and folded over the ends.


Time for a little chalkboard bunting.


I used a piece of canvas board for the triangles.


After they were all marked out I used a craft knife to cut them out.
I sanded the edges and painted them with chalkboard paint.
When the triangles were all dry I drilled holes in them and strung
them with Divine Twine.


LOVE this bunting!!!


After attaching the bunting to the chicken wire the really fun part started.
Adding what ever seemed to catch my eye and helped me to create a
friendly message for who ever nocks on my door.


A Mason jar to hold some seasonal blooms.


A paper flower, vintage button, and more Divine Twine.


*****pink geranium = love*****


Vintage admit one ticket, stamped with the word joy.


A tag, stamped with the word friend.


Some lace from The French General craft
supplies. A chalk drawn welcome message
on the bunting.


That about sums it up.
Enjoy your weekend!


Supplies:

Vintage frame

Chicken wire

Staples and staple gun

Tin snips

Kraft knife

Drill

Craft glue

Divine Twine

Mason jar
Various trim and ribbon
Chalkboard paint
Canvas board
Vintage buttons
Paper flowers


Come check out the fun over at Be Different Act Normal.....,
Tatertots & Jello, and.....Thirty Hand Made Days, and
I Gotta Try That,and Today's Creative Blog


Friday, May 11, 2012

All Grown Up .....&..... The Giveaway

First off thanks again to my blog readers.
Their were only two qualifying comments
for the giveaway.So, I declare TWO winners.
Jan and Deborah Lynn!
I'll ship out your gifst sometime next week.
Bear with me as my allergies have completely
fuzzed up my head and are making it difficult
to function.  ;(

Now take a look at this!
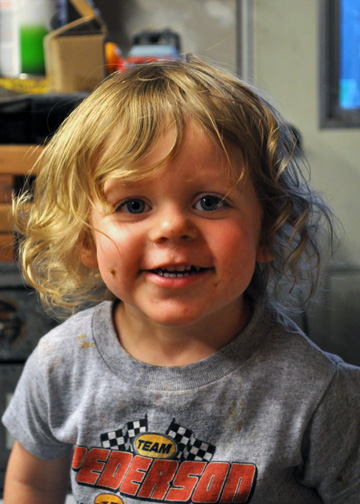
My baby is all grown up.
My youngest had his first hair cut.
It was way over due..... but, to cut those curls.....!
Once you do they never grow back and the
baby is gone.


The poor guy, he couldn't see any more.  ;)
Look at him all smiley. So unsuspecting.


Oh,....... now he gets it.....


AND he don't like it!
Poor guy.
Buy buy baby.


Now I have another big boy. Who after his tub
helped his dad turn his crib into a toddler bed.


H-E--Double-Hockey-Sticks!
When did this happen.
Oh.... they grow so fast.
Bittersweet.


Monday, May 7, 2012

Kitchen Sink Banana Bread

Are you a MOM with picky eaters?
What kid isn't a picky eater?
This recipe may help your little ones eat
more veggies.


Kitchen Sink Banana Bread.....
or zucchini, or carrot.....!  ;)

I use to grate the veggies for this on a fine
box grater. Now I just use the food processor.
My kids love this bread so much they don't
seem to mind the evidence of zucchini and
carrot any more.

Whisk together the dry ingredients.
2c. wheat flour
2T. ground flax seed
1t. baking powder
1/2t. baking soda
1/4t. salt
Set aside

In another bowl cream together
1/2c. melted butter
1c. sugar
2t. vanilla
1/4c. milk
1 egg
1c. mashed bananas

Mix into the wet ingredients
1c. grated carrots
3/4c. zucchini
1/2c. sliced raw almonds

Once everything is moistened add the dry ingredients.
Mix just until combined.

I divide the batter into four mini loaf pans. This makes freezing any
extra bread really easy. Bake in a 350 degree oven for about 45 to 50 minutes.

This bread is so yummy!

So moist.

Sliced and spread with a little Nutella......sweet and pretty healthy.
For a baked good that is.... ;)

Remember to leave a comment on this post or the previous
post for my 1 year Blog-iversary give away. 


Thursday, May 3, 2012

One Year Blog-iversry

One year........ 56 blog posts!
Who new I'd still be doing this!?!
I feel as thou I haven't even dipped my little toe in to the blog pool.
So much more to come..... big blog plans!

Thanks to every one who follows my blog.
It's so weird to see my stats every day.
All the comments and e-mails......cool!
AND to see people who I don't even know pinning my stuff...WOW!
I've had so much fun and so many good things have come from blogging.

Anyway........ if you would indulge me......?
I thought I would post about the best things I ever made.
Yes,..... my kids. Corny I know but, if you make it to the
end of this post and leave a comment ....there's a
give awayyyyy. Twelve of my favorite things. One for
each month of blogging. If you know me, you already have
guested one of them is a Starbucks card! ha


Treat after an Ikea trip.


Both are suckers for the swing.


Trip to the Jelly Belly.


They were not feeling the hats.


Speaking of hats.


We went threw a big Firefighter phase.


Now we are onto a bee exterminator phase.
Don't ask.......?


They are choosing and making their own snacks.


Yes....... those are frozen peas and waffles.
They ate it..... NOT me.


Doesn't that expression just say tasty...?

Just a few more photos.... you're doing great.


Oh... if looks could kill.
He's sick of the camera.


So is he!


His face is always messy....... how..... why...?


He can use the camera on my phone..... yah!
That was a sarcastic yah, just incase you needed clarification.


They are little s--ts and I love them so.
Perfectly in-prefect.
Loud, messy, rude, loving, kind and smart.
Most of all happy and curios. I'm so thankful for them.
Hands down the B-E-S-T things I ever made.


Ok.... I know that was a bit like looking at someone
else's vacation slides. So, thanks for putting up with me.
Hay It will only happen once a year. PROMISE

Now leave a comment attached to this post letting
me know what the best OR worst thing you ever created was.
I'll choose the winner to the 12 things giveaway next 
Thursday, May 10th.

Thanks again for a great year,
Kerstie


Wednesday, May 2, 2012

Mother's Day Gift Box


I like giving gifts but,what I really LOVE is packaging them up.
So much fun.........! It's nice to make people feel special and
appreciated. Who doesn't like getting something pretty to unwrap?
With Mother's Day just around the corner I thought a pretty little
gift box was in order.


I covered a plain brown box with some Bitty Bags.


Then using more Bitty Bags and some
Divine Twine, that I wired I created a bouquet.

Wiring the twine is super fun.


Simply feed some fine gauge wire and twine into the tip of a drill.
Squeeze the trigger while holding the other end of the twine
and wire with a pair of pliers.


Perfectly wired twine every time........ perfect for flower stems.


Now for the flowers.......


Cut out about 10 circles.


Stack the circles on top of each other and staple the center.


Starting with the top layer fold and scrunch the layers of paper.


Attach to some wired twine and you have a flower.


For this type of flower you will need a piece of paper folded in half.

Starting at the folded end cut some strips. Leave enough uncut paper
to add a stem.


Roll up the paper and steam, and your flower will form.


Buds are fun to make too.
Start by drawing a circle with a swirl in it. Cut out the circle and
along the swirl line.


Roll up the strip of paper and glue at the base.


Once you have made enough flowers now
the fun begins, creating a bouquet.


I really had fun with the wired twine.
I plan on using it in some future projects.
CAN'T wait to play with that some more!


Supplies

Plain box
Craft glue
Hot glue
Scissors
Craft knife
Stapler
Fine gauge wire
Drill
Pliers
Bitty Bags and Divine Twine


I'm linking up over at Be Different Act Normal come join the fun!