Saturday, November 24, 2012

Thanksgiving and The Broken Arm

Thanksgiving started out with a little crafting.


Painting ceramic turkeys from the dollar
section of Target.


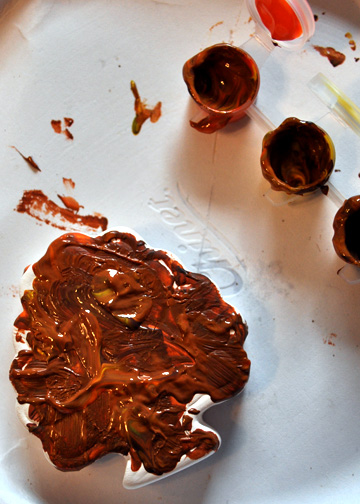
This guy is becoming VERY detailed.


Painting the hole in the back side of the turkey
brown because "it is his bummie."
Oh my.......!


Kids........???


Then time for turkey,


stuffing,


happy boys enjoying their dinner.


PIE


yum


Broken bones.


Yep....!
My parents had a tent set up in the family room for movie watching.
Well, my boys decided to turn it on it's side a practice diving into it.
My older son landed on my little guy's arm.
His cry was different so I knew something was wrong.
He got over it fast so I kinda thought everything might be ok.
Then he started favoring it and by 12:45 am was crying uncontrollably.


My husband took him to the ER while I stayed at home with
our older son. At 3:30 am they were home splint on and  an
ex-ray showing a compression fracture. JOY.....! BUT,
not near a growth plate, and because his soft bones still have
a lot of development to do there will be no evidence of this break.
Whooohooooo sigh of relief.  ;)

So, instead of black Friday shopping we read stories at
the Doctor's office and


had Jamba Juice. He gets a cast sometime this week.
Apparently the Orthopedic Center was closed on
black Friday. What gives?????  ;)


Today was decorating and going to a birthday party.

I bought a white Christmas Tree, I did!


It feels kinda weird, having a white tree. I have had a "real green
tree" all my life. I have always wanted a white one. We decided
last year after 2 hours of stringing lights and stepping on a light
bulb this would be the year for the "fake white tree"......
and I LOVE it.


Though, now I think I need some new ornaments, thinking glittered birds.

;)


Monday, November 19, 2012

DIY Bathroom Remodel Part 4 The END


It's been awhile since I posted a bathroom update.
We did finish it, minus the warm and fuzzeeeezz.


After

Love it. It is so much more functional than the
before and a whole lot prettier too. 

Before
(for the record that green was a miss tint,
I just didn't have it in me to go back to the store.)


If your interested here are the links to the
previous powder room posts.


When I last posted we were getting ready to texture.


It's a messy job but, sort of fun.


Once the mud is splattered on the wall and
dries a bit, the fun part starts.


Smoothing it out with a putty knife.

Once the texture was dry we painted then
got to work tiling......


..... and tilling.....


...... and.......


.... tilling!

Investing in a tile saw was a good idea.


They can be rented but, for almost the same
price as buying one. AND If you buy one you
can tile at your own pace. Which was good
for us since we have two little ones whose
needs come first.


I'm in love with this beveled edge subway tile.


After the walls were tiled we moved onto
tilling the floor.

Black and white hexagon floor tile = swoon!

The ceiling = double swoon!

Tin ceiling tile!!!!

Giddy!!!  ;)

Deep soaking tub with head rest. YES!!

We purchases a vintage dresser to use as a vanity.

My ever so talented Hubby worked his magic on the dresser.
Placing the sink into the top of the dresser and modifying the
drawers to fit around the plumbing.

Top drawer.

 Middle drawer.

Bottom drawer.

I'm loving the detail.....!

I still need a shower curtain and some corbels
to hang it from, art work, towel racks, all that jazz.

I'm so glad we decided to install ceramic
shelfs in the shower. They hold a tun of stuff.
Stuff that would be all around the edge of the tub.
Hate that...... ;(

I scored this vintage looking chandelier at
Lowe's on clearance for a whopping $29.99.
It was oil rubbed bronze. So, we painted white.
Perfect!

L-O-V-E it.

More importantly they love it.


This was a concept board I made myself to keep me on track.

It helps to carry a copy around. So, you can pull
it out to remind yourself of the feel of your design
before you make a purchase.

Ok... lets play the keeping it real game.
My spa like retreat still has these in the tub.

Firefighters and Superheroes......... and I catch
this little guy doing this quite a bit. My boys 
don't have perfect aim, if you know what I mean.
So, my swoon worthy floor is covered in
puddles of pee from time to time.

Ya know we live here. ;) Though, the new powder
room is so much more fun to clean and when I do
clean it, it actually looks like it now. 

We didn't finish the half bath, we started in on
the kitchen instead. The half bath will be after 
the kitchen, then it's the hard wood floors,
garage door, redoing the boys bed rooms,
making a playroom, back to the landscaping,
etc, etc, etc!  ;)

Thursday, November 15, 2012

Hershey's Pumpkin Spice Chocolate Blossom Cookies

These cookies are delicious and so super
perfect for this time of year. They are like
taking a bite out of Autumn.


Have you seen these????? Oh..... yum!!!


Hershey's Pumpkin Spice Kisses......! Ooooh!!
They can be hard to find. I did spot them at Target and Candy.com
sells them too.


The batter recipe can be found on the Hershey's  website.
OR follow the instructions below.  ;)

Hershey's Chocolate Blossom Cookies

1 cup butter softened, I use unsalted.
2 eggs
2 cups all purpose flour
1/2 teaspoon salt
1-1/2 cups sugar
2 teaspoon vanilla
1/2 cup Hershey's Coco
Course sanding sugar
Bag of Pumpkin Spice Hershey's Kisses

This recipe makes about 4 dozen cookies.

Beat butter, sugar, eggs and vanilla in a large bowl until fluffy.

Sift flour, coco and salt together. Add gradually to butter
mixture until well combine.

Cover and refrigerate dough till firm about one hour.

Preheat oven to 350.

Remove dough from refrigerator and shape into 1-1/8 inch balls.

Roll in course sanding sugar.

Place about 3 inches apart on cookie sheet. Bake 8 to 10 minutes
until set.

Remove from oven and place a kiss in center of cookie.

Transfer to a cooling rack.

This is really a delicious cookie. As the pumpkin kiss melts it
releases a spiciness into the chocolate cookie. So the whole
cookie ends up having layers of flavor.


This will probable be the extent of my Holiday
baking due to the fact my kitchen looks like this.


More on that latter......! Wish me luck.